Friday, June 29, 2012

June Wrap Up!

The year is half over!! How is this possible? Does it seem like that can be?


If you missed any of this month's posts, now is your chance to catch up! 


1. Big reveal of my new office
2. Summer printables - kids media sticks and chores
3. Summer cleaning schedule printable and projects
4. Organizing my office
5. Organized Reader
6. How to make a simple chore chart
7. Behind the scenes and how to's of my new office
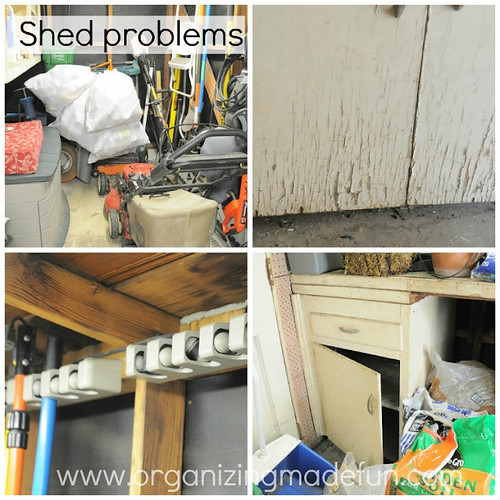
8. My shed project - BEFORE
9. Lay N Go giveaway
10. My roof is done!
11. OMF to the Rescue: Mona's closet dilemma
12. Haven Conference Wrap Up


Once last thing...if you are on Facebook, be sure that you go to the OMF page and you are adding it to your favorite pages {or any other favorite blog}. Don't know what I'm talking about? Need help figuring out how to keep Organizing Made Fun in your FB newsfeed? Well, go HERE. My friend Kelly has the BEST tutorial on her blog all about how to do it. 


Pin It
Photobucket 

 Like what you see here? Consider becoming a follower or subscribe via email! 

Join me on Facebook - where we interact and have lots of great fun. You can also see behind the scenes pictures and fun stuff I do on my Instagram!

Wednesday, June 27, 2012

I found my haven in Atlanta

I went away for about five days last week and headed to Atlanta, Georgia for a bloggers’ conference called Haven. It was a conference specifically for home décor/DIY bloggers and it was just like its name – a haven! It’s hard to describe the camaraderie of bloggers. It’s something that most of us bloggers can’t really share or talk about much with even our close friends or family because they don’t understand the lingo, the online relationships, and the hours and hours and hours it takes to run a blog, and usually get bored hearing us talk about HTML, stats, and SEO. So staying up until 1 AM to talk and chat at the conference was pretty normal for all of us and worth the lack of sleep we all got.


Top Left: my new polka dot bag. Bottom Left: reading material on the plane. Right: My love note I found in my suitcase from my sweet Rachel.

What did I learn about? Well, there were lots of classes you could take. I specifically wanted to learn about SEO, running a blog better, PR, advertising, making money, photography, photo styling, blog design, and furniture painting. There were so many more classes I didn’t even get to like: thrifting, decorating 101, furniture building, and many more.

I have a HUGE to-do list now for this blog and that is going to take a lot of extra time to get through that list to make OMF better. To help you better understand what it takes to run a blog, each post that you see {three days each week} takes me an average of 5+ hours to put together. Surprised?  Well, it does. I have to DO the project. I have to take photos WHILE I’m doing the project. I have to write the post. I have to edit the photos. I have to edit the post.  Plus, there’s all the social media and link parties to get my blog known so you can find my organizing ideas!  There’s emailing with companies for advertising and giveaways, answering emails and comments from my lovely readers. You can see, it’s nearly become a full time job for me – remember I’m also a piano teacher with 15 students! Oh, and did I mention I have a family and home to run, too? Well, I know what it’s like to work because I’m about up to full time work hours, as you can see. But, I LOVE it – I absolutely LOVE to blog. I work every spare minute I can – just ask my husband and friends!

Top Left: Allison Hepworth. Top right: Beckie Farrant. Bottom Left: Andrea. Bottom Right: Anna, my roommate at Haven.

Now…enough about all that blog stuff and why I love it. Let me tell you about some amazing ladies I met and whom you might like to get to know. My roommate was Anna, of Ask Anna. She and I are both Christians and we both love organizing and decorating. We were a great fit as roommates. She is more of the “cleaner” than me – I just like to organize everything, I’m not so much the germ-a-phobe, which she’ll readily admit to. She and I are both from California and have been to each other’s houses, too! We had lots of late night talks and never seemed to run out of things to talk about.

I also got to see my friend {whom I roomed with at Blissdom}, Allison from House of Hepworths along with some of her Texan friends that she roomed with, Beth {of Freestylin.com} and Jamie {of C.R.A.F.T}. They were just sweet ladies and I got to talk a lot with them. FYI - I didn't take nearly enough pictures because I'm terrible at taking "people pictures" and usually just take pictures of stuff! So this is what I have...


I made fast friends with sisters Vanessa and Heather from AtThe Picket Fence. I had never been to their blog before and I can’t understand why. They have some great stuff and are amazingly good at what they do. We laughed and talked for hours about so much stuff!

Brittany, the Pretty Handy Girl, and I became friends at Blissdom in Nashville, and I had the privilege of joining her {on the day after our conference was over} at a Habitat for Humanity Restore in Atlanta. She spoke about recycling and restoring old items. She’s amazing and everyone loves to be around her – she’s definitely a people person. She can fix just about anything and has amazing tutorials on her blog about how to fix, make, and do so many things. I would recommend her as a great resource for all her great tutorials on DIY {especially geared for women}.


Then I got to meet Beckie with an “ie” – one of the most creative ladies I know who blogs at Infarrantly Creative {she’s also got two other blogs – Knock Off Décor and Road Kill Rescue}! She is an amazing businesswoman as well as blogger. She has a great handle on how to do this whole thing and had great advice for us on that.

The trip to Atlanta was absolutely worth the lack of sleep, the time change, the lack of not eating enough, and having to be away from my family for a short time. But, I’m still a wife and Mom, first, and it is good to be home with my family. It’s hard to balance working from home as a blogger and being the “COO” {chief operating officer} of your household. I hope that you will begin to see changes on the OMF blog that you like. To start, I re-wrote my “about me” page. I’m hoping to update my home tour page soon, too, but it takes a ton of time to do that so I’ll let you know when that happens.

I’m also going to be helping you with organizing your kids {and making your life a little calmer, hopefully} in a whole different way as I am partnering with Positive Parenting Solutions for a FANTASTIC webinar that she is hosting next month. If you’ve never heard of this site, I’m going to tell you more soon about it and, trust me, when I talk about having a calm and organized home, this is going to help a lot of Mommies with all of her great advice. I look forward to another great year of blogging and motivating all of you to organize!!!


Pin It
Photobucket 


Like what you see here? Consider becoming a follower or subscribe via email!

Join me on Facebook - where we interact and have lots of great fun. You can also see behind the scenes pictures and fun stuff I do on my Instagram!

Parties:
Southern Hospitality

Monday, June 25, 2012

OMF to the Rescue: Mona's closet

It's time for another OMF to the Rescue! I received this email a little while back and wanted to help her desperately! 


Mona wrote to me and ask me this:

I am in desperate need of a closet redo and was wondering if you would mind making some suggestions.  Basically I share my closet with my elderly mother (tore down wall between for more space) and it is not efficient at all.  The closet is 44 1/2 inches wide, 58 inches deep, and 8 feet high.  I have shelves on both sides (48 by 11.5 inches) two feet below the ceiling.  The closet opens to both rooms by doors on either side.  I have attached a couple of pictures so you could get an idea.  I am looking for budget friendly solutions (hopefully around $100 for total redo) because I had to cut down on work to care for my mother due to some health problems.  Basically, I am going to repurpose things I already own and hope to buy some low cost storage solutions (shelf dividers, storage boxes).  Please help!!!


So, here are some of my ideas to help her with her problem.


If possible, I would suggest actually taking down one side of hanging. The closet is just so narrow that you can't walk through it when the clothes are hanging - as you can see above. Use one rod but add a double hanging rod. This will take up about half the side of the rod so that she can store her shorter items on top and her mom's items on the bottom - separate but still in the same space.
Source

For the rest of the rod, where they are hanging longer items, you can divide it with simple dividers {very inexpensive}. 
Source

Across from the hanging, once you've take down the other hanging storage, I would suggest getting a narrow dresser or shelving. You can re-do one you already have OR get one at a garage sale. If you can't find anything that narrow, here is one above that is narrow and has wheels to roll in and out and is inexpensive. 
Source

Here is what you could even do with an old dresser or nightstand. They even added a little chair here next to it, but a roadside rescued dresser with no drawers can be turned into something clever for your pants and sweaters.


Source

You can make baskets using cardboard boxes that you can fit to your shelf to hide ugly things or just leave open like above. 


Source

Above the small shelving you can use molding for something like this to hang shoes. 
Source

Or, use that wall to your advantage - as a matter of fact, use the two doors on either end of the closet to your advantage also and put stuff on the back of the doors. I have a whole post about that, but here is an example above. 


Source
And another here...You can also use command hooks to hang up all sorts of things on the walls up high or low - and even on the back of the door. 


Source

Add a laundry basket or a laundry sorter, this one above is a little more for your budget at $60 but would be a really good use as the bar can go up and used to hang clothes, as well you can roll it to your laundry area OR just grab a bag or sorted laundry and take right to the laundry room. I hope all these ideas have helped Mona AND you, too! When you have a small budget, it's possible to organize but you may have to put in a little more work to do it! 
Organizing closet odd size help

Keep your pictures coming...I enjoy trying to help solve your organizing dilemmas. Email me and send me the pictures of your unorganized spaces. Anyone else have any other ideas for Mona's closet?


Oh, and don't forget...the giveaway for the Cosmo Lay N Go ends TONIGHT at midnight!!! Go HERE to make sure you've entered!

Pin It


Photobucket


Like what you see here? Consider becoming a follower or subscribe via email!

Join me on Facebook - where we interact and have lots of great fun. You can also see behind the scenes pictures and fun stuff I do on my Instagram!

{I have used links for products in the above post that link to my Amazon affiliate account, since many of you ask where to find these products}


Parties:
Tip Junkie
Home Stories from A to Z
Organize and Decorate Everything
Delightful Order
Positively Splendid
Iheart Naptime
Tip Junkie

Friday, June 22, 2012

The roof is done, the roof is done!

I know this isn't the most exciting organizing post of your life, but having been working on the curb appeal {windows, doors, paint, roof} and back patio for awhile now - like since November - it's so nice to see another thing done! Our roof {and chimneys} are done and looking nice. Is it totally done? Well, not quite - we still have the gutters on the front. And the back patio looks AMAZING and it's got a little left to do before I can show you the most incredible patio cover I've ever seen!


So, here is our beautiful front of the house! I love it - yes, I love color! I'm not afraid of it and I'm so glad that we painted it this color. With all the people who come over, it's easy to spot our house from a block away! It's unique and not boring and it's totally me. 


You can see, before, that it was bland and sad. It lacked any personality and was in desperate need of a paint job. Here is how things started....



Last summer we got the holes drilled into our walls and insulation blown in. Then, we realized how bad the windows were and that all the energy saved on the walls being insulated was "going out the windows" and so we decided to just do those, too.


Well, as with any project, it snow balled...and we ultimately decided on doing much more - thanks to some seriously great re-financing and super duper low interest rates, we have a "little" bit more than we had originally anticipated!! In all seriousness, we just plan to be here a long time {Lord willing} and want the house to fit our uses and be what we want it to be. 


Anyway, all that to say here is what was done on the roof: New roof {big job}, new stone on the chimney to match outdoor kitchen stone, chimney mantle, fancy chimney cap, and there are clips ready to install solar panels. The solar panels are going to be a bit because we are waiting on the city - they have run out of "rebate" money for them and it's worth it to wait until it's there again. So, they look a little strange for now and it may be {gulp!} six months before we get the panels because the city is doing a whole "lottery" for who can get the rebate money - I guess more and more people are doing solar panels so it's a good thing, just bad for us waiting! So, there you have it! A new roof...done!


Pin It
Photobucket 

Like what you see here? Consider becoming a follower or subscribe via email! 

Join me on Facebook - where we interact and have lots of great fun. You can also see behind the scenes pictures and fun stuff I do on my Instagram!

Parties:
Thrifty Decor Chick: Before and After

TDC Before and After

Wednesday, June 20, 2012

Giveaway: Lay N Go Cosmo

I am SUPER excited to show you this amazing product! Do you remember last months I did a whole post about my mineral make up getting all over the place? 


Well, that led to one of my FABULOUS readers sending me this idea about a product she had gotten for Mother's Day. She said it was a  Lay N Go Cosmo and it was for her make up. So, what did I do? I emailed the inventor, Amy, and asked her if I could try her product and give one away. And guess what? She sent me one RIGHT away! This is the SAME company that makes these other fabulous products - the original Lay N Go and the Lay N Go lite! You may have seen them on Pinterest....that's where I first saw these.


This couldn't come at a better time....right this VERY minute I am on an airplane flying across the country to attend a DIY blogger's conference in Atlanta, called Haven. So, I am using this very product on my getaway! 


Here's how it works. You lay it out, put your make up, brushes, and whatever else you used to paint yourself pretty in the morning. When you're done, you zip it shut. The website has a video on how it all works to make things even easier!


Lay-n-Go® COSMO (patent pending) is an 18” diameter cosmetic bag that converts into an easily transportable handled clutch allowing for quick and effortless clean-up of your cosmetics.  Cosmetic collections used on the Lay-n-Go surface are easily spread out on a clean, contained, and dry surface…we even added a pocket to the inside for discrete storage.  No more dumping your collection onto a towel or having to worry about your cosmetics rolling off the counter and onto the floor.  Once you are done, pull the drawstring and the cosmetic bag is converted back into a completely sealed soft clutch.  Lay-n-Go COSMO is a smart and easy 4-in-1 solution….clean surface, quick cleanup, carryall and storage.
  • Shell is 100% quilted smooth poly and easy to wash/dry
  • Liner is 100% nylon and provided a water repellent/wipeable surface
  • One 7”x 5” zippered pocket on the inside surface to stow any special brushes or use as a hide-a-way for pills, feminine products or jewelry
  • Durable nylon cord and cord lock that provide a quick and easy opening/closing system
  • A special designed “lip” around the bag, which will keep your make-up from rolling off the counter or falling into the wet sink
  • A velcroed front storage pocket provides a place to stow the drawstring when closed and carrying or storing the bag
  • Nylon handle adds both comfort and convenience for carrying
Lay-N-Go Facebook page

Lay-N-Go Twitter

And now, you get an opportunity to win one of these FANTASTIC carryalls! Don't miss it - giveaway ends June 25th and I'll announce the winner on the 26th!


P.S. Want to see all about my trip to Atlanta at the Haven Conference? Follow me on my journey via Instagram! You'll get to see all kinds of neat DIY bloggers and "meet" them along with me!

Pin It
Photobucket 


Like what you see here? Consider becoming a follower or subscribe via email! 

Join me on Facebook - where we interact and have lots of great fun. You can also see behind the scenes pictures and fun stuff I do on my Instagram!

Monday, June 18, 2012

My Sad, Sad Shed Is Ready for a Makeover


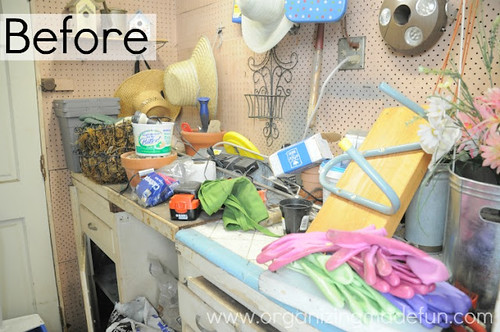
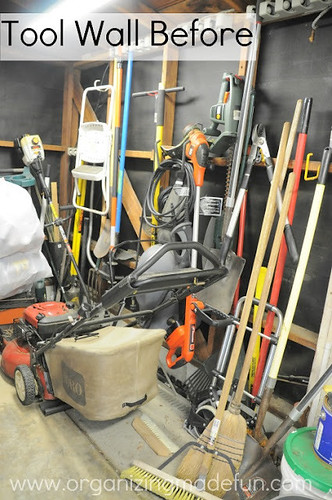
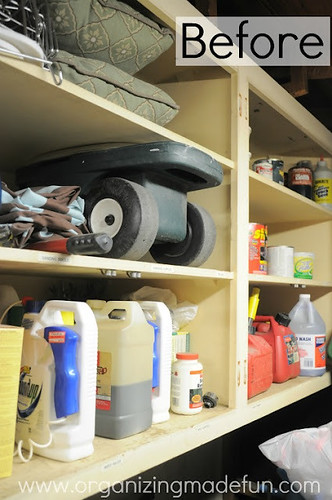
I want to tell you that the state of my potting shed is sad. Really sad. I DO have an excuse for its current state, but I am hoping to make it a very fun place to be, where I can pot my plants and keep our tools.


Why have I let it get to this state? OK, here are legitimate excuses:

  • I'm not the only one who uses it. Since this is the case, I have seen "someone" leave unexplained tools on my potting counter and never put them away.
  • We had a roof leak. The water has made a big mess and caused the already old cabinets to be really bad.
  • There are rats in there. Yuck, I know, but that's the truth. I think once I rip out the cabinets I will discover how they are getting in.
  • We got a new roof. When they fixed our roof, an even bigger hole appeared where they covered it with new plywood. It made a big, lovely mess!
  • I need to clearly label things so they get put back properly.


That's it! Now that you know my excuses, I want to share an amazing thing that Sherwin-Williams has. I plan to do some serious improvements in the shed and lots of painting, so this new "tool" is going to help me choose my colors! It's super cool and easy. It's called Chip It!


You see, you can get the Chip It! button just like the Pin It button for Pinterest - and you all KNOW how much I LOVE Pinterest! You drag the Chip It! button to your toolbar: Chip It!
Watch the video on the site and it will show you exactly how to use the Chip It! button - it's super easy!


Whenever you spot a photo you like online, just click the Chip It! button and then click the photo itself. And voila - you get the picture's paint colors. You can use any picture you find online and turn it into your perfect palette!


It's seriously cool. I can go to the Pinterest boards that have inspired me - something with great colors - and just click on the Chip It! button and it comes up with all the paint colors!

Source

{Above} This second inspiration picture, which I also love, is not yet "chipped." It's beautiful, but having the Chip It! button to give me exact colors will make it much easier to narrow down my decor! I haven't figured out exactly what colors to paint in the shed, but I'm thinking fun and bright colors, since the room is so dark and drab.


I want my room to get me feeling like I want to garden. And, I want it to be ORGANIZED nicely, too!


I have some AMAZING ideas for this tiny space, and I'm still deciding on the colors! The walls will look nothing like they do now. The ceiling needs some painting. The cabinet has seen better days...so I plan to get something from the Restore {Habitat for Humanity} and paint it. See that above? Those are all my ideas of colors I'm thinking of, using the Chip It! button to help me decide. {Just so you know, you can save your ChipCards to ChipBooks for later use.} What do you think? What is your favorite color combination?

For a chance to win a $1,000 Visa gift card and a $200 Sherwin-Williams gift card, chip my second inspiration image and guess which photo I'm going to use to make over the shed. {Email Subscribers please click over to the blog and leave a comment to enter.}

Rules:
No duplicate comments.
You may receive (2) total entries by selecting from the following entry methods:
a) Leave a comment in response to the sweepstakes prompt on this post
b) Tweet about this promotion and leave the URL to that tweet in a comment on this post
c) Blog about this promotion and leave the URL to that post in a comment on this post
d) For those with no Twitter or blog, read the official rules to learn about an alternate form of entry.
Entries from all participating blogs will be pooled for winner selection; only two entries per household.
This giveaway is open to US Residents age 18 or older. Winners will be selected via random draw, and will be notified by e-mail. You have 72 hours to get back to me, otherwise a new winner will be selected.
The Official Rules are available here.
This sweepstakes runs from 6/18/2012 to 7/6/2012.
Be sure to visit the Sherwin-Williams brand page on BlogHer.com, where you can read other bloggers’ posts!


Pin It
Photobucket 

 {This post brought to you by Sherwin Williams, who has given me a monetary incentive to tell you about their new program}

Parties:
A Bowl Full of Lemons