Friday, August 31, 2012

August Wrap Up-what did you miss?

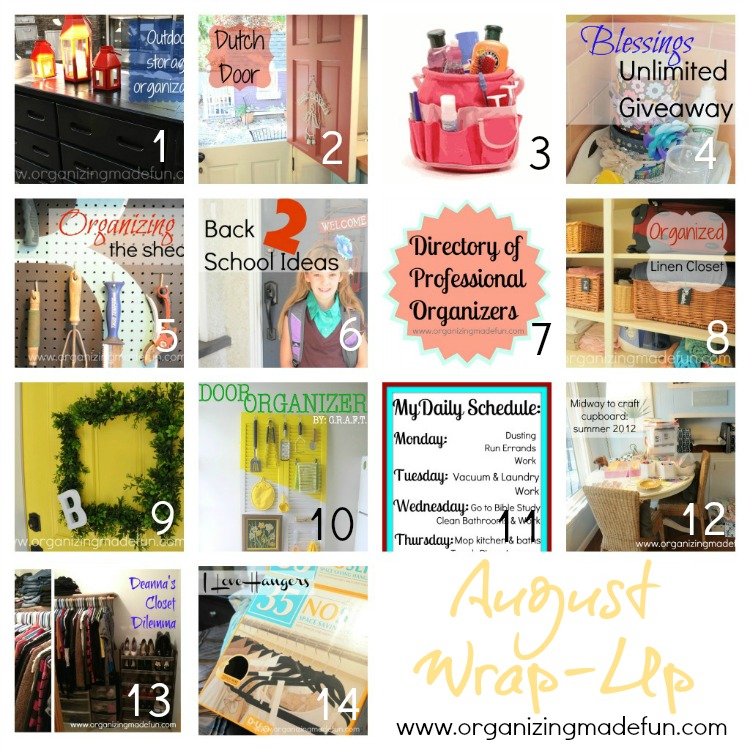
It's the end of August, fall is coming soon! Here is what happened at OMF in August!

{If you are an email subscriber, you will now have to click on the post title to see the whole post}


Did you miss anything? If so, here is where you can find it:

Wednesday, August 29, 2012

Hangers Schmangers!

Yes, I really AM going to chat about hangers and how they are a big deal. Why would hangers be a big deal? Well, let me show you! 


{If you are email subscriber, you will now have to click on the post title to see the whole post}


First of all, if you have a closet {which I'm betting just about all of you do}, you have hangers. You either have too many hangers with too many clothes in there or just enough. Either way, you have to think about it sometimes. I'm always getting emails asking me how to get more into your closet or organize a closet better. I have another great solution! 

Tuesday, August 28, 2012

Stolen and unhappy

Well, it has been brought to my attention by many, many bloggers that many of us are victims of stolen and scraped content from our blogs. I thought I had set up enough things to keep my content from being taken, but apparently I have not! You can see HERE, HERE, and HERE about what other bloggers are now having to do, which is truncating the RSS feed. 

Monday, August 27, 2012

OMF to the Rescue: Master closet organizing dilemma!

Can you believe it's been over two months since I last did an OMF to the Rescue? I've been a slacker at this, so hopefully it will get some of you motivated - and I'll try to get another OMF to the Rescue to you soon! Woohoo!  Here is the master closet dilemma.


Friday, August 24, 2012

The evolution of a craft cupboard {Before and Midway}

This will not be a fun "look at how pretty it is" kind of a post! It's going to show you the evolving "craft cupboard" that I've been working on. This is the before, not the after.


First, I'm showing you the WAY before. This picture is from right before we moved into our house, in 2006. This family room has come a LONG way in six years. The wood paneling, the swimming pool tile floor, the curtains, the windows - all are completely changed! Of course, the furniture also since this was the former owner's furnishings. And who puts a cabinet knob in the middle of a cabinet? Do you know how hard it is to open it like that?


You can see I painted the paneling a light blue and then my Hubby and Daddy put in hard wood floors {they float over the existing swimming pool tile} - and I painted the entire ceiling white! What a HUGE difference those things made in this room! You can see in the corner where the future craft cupboard will be. {The couch is from Costco, since many of you have asked}.


In 2010 we knocked down our kitchen wall and I had an extra table. So, I moved it into the corner back there and made it a game cupboard and table to play games at.


Here you can see that I painted all the cabinets in the family room white and put in new hardware {covering up those holes in the middle of the doors, too, where the knobs used to be}. The top of this built-in cupboard has all our family photo albums and yearbooks. I haven't been too fond of how it looked. Just looks cluttered to me!


Since the kids are playing less and less games and my daughter and I have been crafting more and more, I decided we needed a place to put all the craft supplies. I must admit that this is has been one of the hardest places for me to organize. I'm nearing completion on this thing, but this is what it looked like for weeks! It's rather sad, but I didn't want to rush to put everything back until I was sure how I wanted to organize it all - if you are Instagram you have seen me show bits and pieces of how I've been working on it. So, I hope to have it finished in a couple of weeks to show you the complete and organized craft cupboard! Whew! I've got a lot of labeling to do and I want to make it creative and fun, too! So, it will take me some time to get that accomplished. If you'd like to see more ideas that I've been using to organize this craft cupboard, go to my Craft Cupboard Pinterest Board.

Do you have a certain area of your house that has stumped you organizing wise? What area and what have you done? If you're still stumped, email me a picture and I might select you for OMF to the rescue to give you ideas of how to organize that area. I'm always looking for a challenge!

Pin It
Photobucket 


Like what you see here? Consider becoming a follower or subscribe via email! 

Join me on Facebook - where we interact and have lots of great fun. You can also see behind the scenes pictures and fun stuff I do on my Instagram!

There are some products that are linked to my Amazon affiliate link.

Wednesday, August 22, 2012

How to make a simple {and cute} printable with PicMonkey

Have you seen all the cute printables floating around and wondered how you could make something like that but just for YOU? I have...I'm a problem solver and ambitious girl so I wanted to figure it out. I use PicMonkey for all my photo editing and I love it. It's easy to use, user friendly, and FREE! That's my kind of website!


with PicMonkey


So, here is a step by step of how I made this printable schedule.


First, go to PicMonkey.com and click on "Create a Collage". 


Next, you simply save the blank collage. You can name it whatever you want! I creatively called it "blank collage" - mostly because I can use it over and over again.


I realize this seems simple, but once you save it you'll need to click the "x" in the right hand corner. Then, at the front page click on "edit a photo".


Simply open the "blank collage" that you made.


Once you get it open, you want to click on the symbol at the top {see where the arrow is pointing below} and "resize" the picture to 500 x 750. I use that size because it copies over to a document much easier. If you want a landscape size, just do the opposite of 750 x 500.


This is all real easy - I'm trying to give you every single step for those who aren't sure - so this will take you all of two minutes to do these first few steps.


Then comes the fun part! Pick a frame you'd like to use. I use the Museum Matte for mine.


I also picked my colors, because black and gray were boring to me!


I advise you pick a main font, for titles and such, and one for your normal or subheading content.


When I made my subheading, to save myself time, I right click on the text box and I highlight "duplicate overlay" and then it duplicates the text. Then, I just adjusted the text and tweaked it how I wanted it to look.


Voila! You are done! Adjusting and tweaking are all part of the process until you get it to look nice! Then, save this...


You'll open up Word and insert this as a picture. You may need to adjust the margins a little bit to get it to fit the page correctly. Then, print it up! My secret is out! You can now make your very own printable schedule or chart for yourself! 


Pin It
Photobucket 

Like what you see here? Consider becoming a follower or subscribe via email! 

Join me on Facebook - where we interact and have lots of great fun. You can also see behind the scenes pictures and fun stuff I do on my Instagram!


Parties:

Tuesday, August 21, 2012

Are you getting back to school?

Have your kids started back to school yet? Maybe you homeschool and you are getting ready to start? Either way, you've got to get back into routine, right? 


Well, I'm over at The Better Mom talking about how we get ourselves back into a school routine! Check it out HERE!

Pin It
Photobucket 

Like what you see here? Consider becoming a follower or subscribe via email!

 Are you an Organized Reader? I'd love to see your organized space. Email me HERE and show me your space to possibly be featured as one of my Organized Readers.

Monday, August 20, 2012

Organized Reader Space: Jamie from C.R.A.F.T.

Jamie, from C.R.A.F.T. sent me some pretty neat things that she's organized and transformed for very little and in her small apartment. 


Friday, August 17, 2012

My boxwood wreath to cheer up the front door

I'd like to think I was super crafty, but in all honesty I'm not so crafty. My daughter is craftier than I - that sounds weird, doesn't it? I decided that I wanted to put up a boxwood wreath on my front door cause I saw it somewhere on Pinterest and thought I'd run to Michael's and buy one with my 40% off coupon. You know what? I'm a little behind on seasons, apparently. There was ONLY fall stuff! I couldn't even find foam wreaths, but I wanted a square wreath anyway. So here is what I made!


Isn't it pretty? It's cute and fairly easy and inexpensive! 


Here are the supplies I needed: square frame kit {found this on the clearance aisle}, wood initial, boxwood garland {found in the wedding department}, and floral wire {already had this laying around}.


I put together the frame kit into a square, then I began wrapping the garland around the frame with the floral wire. It was easy, sort of. Once I got a rhythm going it was easy. I also attached two screws on the back of the wooden initial and took the wire and wrapped it around the frame. 


On the back, I used command hanging strips and attach to the frame and then to the front door. The thing I love about these is they are strong {the wreath only fell off once when the door was slammed HARD}, you can adjust it if you put it on crooked {it's velcro}, it's invisible {no one can see how you hung it}, and when you're ready to take them off there is nothing left behind. I sound like a commercial, don't I? I LOVE these and have been using them everywhere in my house to hang all sorts of things on the walls!


Doesn't my cheery, yellow front door now look more cheery? 

Pin It
Photobucket

Like what you see here? Consider becoming a follower or subscribe via email! 

Join me on Facebook - where we interact and have lots of great fun. You can also see behind the scenes pictures and fun stuff I do on my Instagram!

There are some products that are linked to my Amazon affiliate link. 

Parties:
Tater Tots and Jello
Six Sisters
Funky Junk Interiors
Home Stories from A to Z
A Bowl Full of Lemons

Wednesday, August 15, 2012

Tweaking and organizing the Linen Closet

One of my summer "to-do" list items was to re-work my linen closet. I've done it before but because it's been a couple of years, there is just some stuff in it that hasn't really worked like I wanted and I also had to fit more stuff in and take some stuff out.


www.organizingmadefun.com


So, I'll give you a glimpse of re-organizing. Once you get things organized in a certain area of your home, you'll notice after awhile that it needs to be re-organized or tweaked. It's perfectly normal and it just happens as time goes on and maybe you system isn't working how you'd hope. So, just adjust it and try something different.  Or maybe you see something FABULOUS on Pinterest and want to try it that way - which I sort of did too!


www.organizingmadefun.com

I have this great built-in linen closet in our hallway. Our house was built in the 1940s so it has some great details like this, and other not-so-great things, too! But, these are definitely one of my favorite things.


www.organizingmadefun.com

I think before was OK...it has worked for awhile but it was getting messy and I now had a new humidifier that I couldn't fit under the kids bathroom counter and this was the only place it would fit. It was getting in the way. The linens were organized but I couldn't remember which size was where. The blankets were spilling out and I didn't like how they laid in there.


www.organizingmadefun.com


The baskets have liners in them, but they are really in the way of labeling how I want them. So, I took those out. I got these baskets many years ago on the clearance aisle at Target because they were "Christmas" as the liners had snow flakes on them, but I just turned the liners inside-out and Christmas was gone! Then, I used some leftover chalkboard tags that I had made a little while back and didn't use to finish up this project. My friend, Lisa has similar ones of these in her Etsy shop, too. 


www.organizingmadefun.com

I also made up a nice guest amenities basket that I keep in this linen closet. It is filled with all kinds of goodies for my guests to use, if necessary. I pull it out and set it up when they come to stay.


www.organizingmadefun.com

Once I got all the baskets labeled {using one of my favorite tools, cable ties}, I put them back up there.


I decided I wanted to roll the kids' swimming towels and see how it worked out. So far, it's good. They aren't yanking out the towels from back and making a mess of other towels. It's like how I fold their shirts and pants in their drawers and they can see what they want without making a mess of everything else. I keep the swim bag fully stocked with sunscreen and goggles.


It's not a dramatic before and after, but with a little tweaking it is making a big difference in there. I've been able to maintain it easier. 


The linen closet also has a whole bunch of drawers. I actually have several empty! The two on the right bottom are empty so that when we have a guest, I can use those for my daughter as her "dresser" or to put extra pillows, if necessary. I have another drawer just for pillow cases - cause we have a bunch and the kids like to have a cute one with their bedding instead of the matching ones. There are also table linens in another two drawers and one drawer has old sheets and towels for that "just in case" something goes terribly wrong and we have spillage of some sort to clean up and I need to grab something fast!

What kind of linen organizing do you do? A closet, a drawer, a cabinet, nothing? Any other great ideas for organizing your linens and towels?

Pin It
Photobucket 

 Like what you see here? Consider becoming a follower or subscribe via email! 

Join me on Facebook - where we interact and have lots of great fun. You can also see behind the scenes pictures and fun stuff I do on my Instagram!

There are some products that are linked to my Amazon affiliate link.